
[op_liveeditor_element data-style=””]
LESSON: Stop Placement
[/op_liveeditor_element]
[op_liveeditor_element data-style=””][text_block style=”style_1.png” align=”left” font_size=”16″ font_font=”Montserrat” font_color=”%237e7e7e”]We want to place stops at strategic spots where we can and as you learn further as the course goes on, these are cut-off points and trade failure points. If price hits your stop it is a signal your trade has failed and you need to move on to the next trade, NOT push it a bit bigger or give a bit more room to ‘breathe’, aka; loose more money.
Stops for Pin Bars are placed just above or below the wick of the pin bar in most setups.
This is where nearly all our stops will go for the majority of Pin Bars.
Don’t lose site of what your stop is doing for you and that is stopping you from losing more money. Cut these short extend your profits on your winning trades.
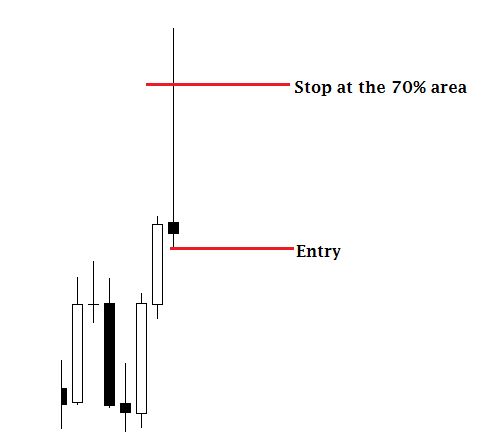
On some other pin bar setups their may be a really large stop due to the pin bar having an extremely large nose. In this case we can use a stop that is at the 70% level of the wick or more.
See the chart for further explanation;
Chart example of normal stop:
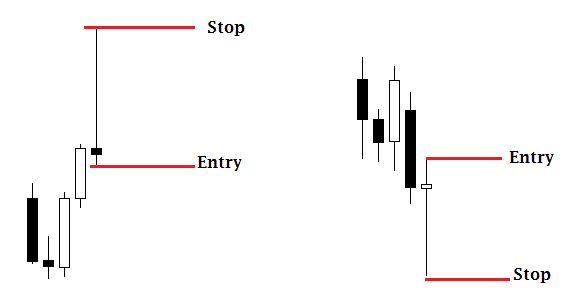
Chart example of 70% stop:
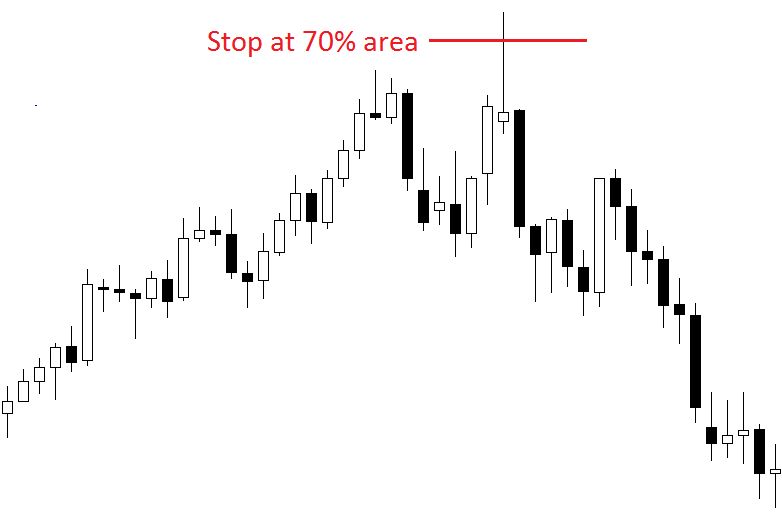
Example of 70% stop being used on a chart:
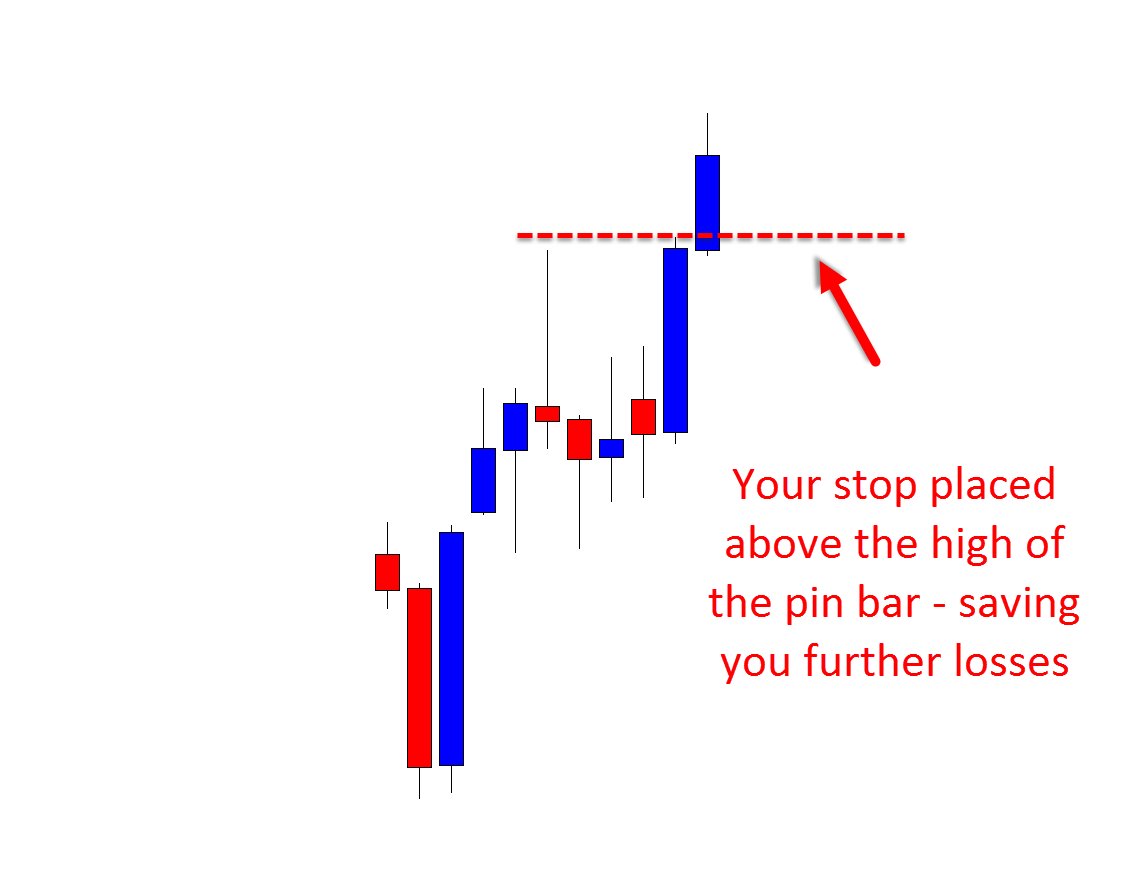
Example of Pin Bar Stop Above High:
Special Note:
The Pin Bar can sometimes take a little time to break and enter the trader into the trade and new traders can get very itchy trigger fingers and for this very reason I write this note.
The pin bar is a reversal signal and because of this it can take some time for the orders to build for the market to change directions. For example; if the market is moving higher and the price forms a bearish pin bar before this pin bar the control of the market was with the bulls or the buyers.
For the market to roll over and move lower enough sellers or bears are going to have to be in control for the market to reach a topping point and a market reversal. Sometimes this can take time and what will often happen is the market will fire off a reversal signal such as a pin bar and then a bunch of indecision candles such as inside bars.
These inside bars are a good thing because it is shows that the bears gained control with the pin bar and now they are trying to suck the last remaining orders out of the market.
The pin bar reversal remains a valid signal unless price moves through the nose of the pin before it enters the trader into the trade. If this happens then the trader would cancel their trade and start looking for their next trade. There are no time limits on the pin bar as explained above.
 [/text_block][/op_liveeditor_element]
[op_liveeditor_elements][/op_liveeditor_elements]
[op_liveeditor_element data-style=””]

[/op_liveeditor_element]
[op_liveeditor_element data-style=””][text_block style=”style_1.png” align=”center” font_size=”25″ font_font=”Source%20Sans%20Pro” font_style=”bold”]
Module Six
[/text_block][/op_liveeditor_element]
[op_liveeditor_elements][/op_liveeditor_elements]
[op_liveeditor_element data-style=””][text_block style=”style_1.png” align=”left” bottom_margin=”10″]Duration: 5 mins[/text_block][/op_liveeditor_element]
[op_liveeditor_element data-style=””][text_block style=”style_1.png” align=”left” bottom_margin=”10″]Module Progress:[/text_block][/op_liveeditor_element]
[op_liveeditor_element data-style=””]
[/op_liveeditor_element]
[op_liveeditor_element data-style=””]
[/op_liveeditor_element]
[op_liveeditor_element data-style=””][text_block style=”style_1.png” align=”center” top_padding=”6″]« Previous Lesson[/text_block][/op_liveeditor_element]
[op_liveeditor_elements][/op_liveeditor_elements]