
[op_liveeditor_element data-style=””]
LESSON: Good Bullish and Bearish Engulfing Bars Examples
[/op_liveeditor_element]
[op_liveeditor_element data-style=””][text_block style=”style_1.png” align=”left” font_size=”16″ font_font=”Montserrat” font_color=”%237e7e7e”]
Chart Examples Engulfing Bars
Chart Example #1:
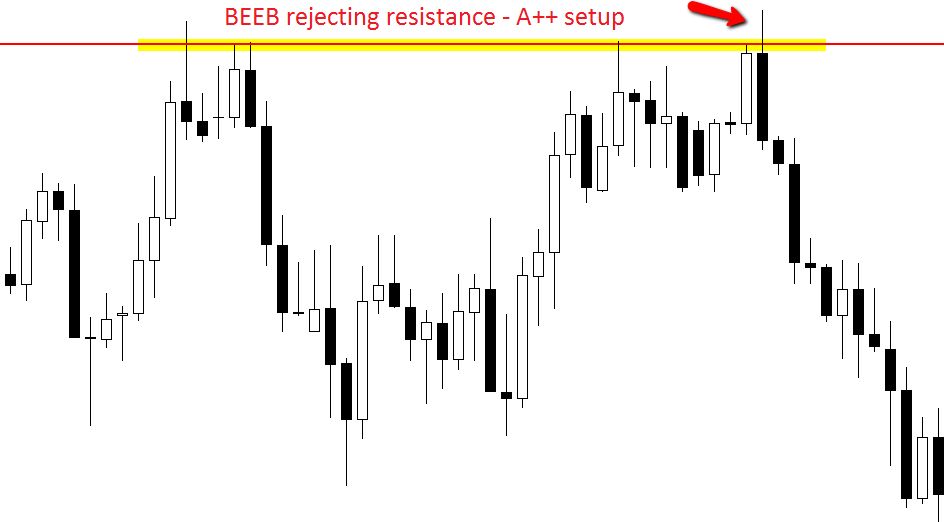
Chart Example #2:
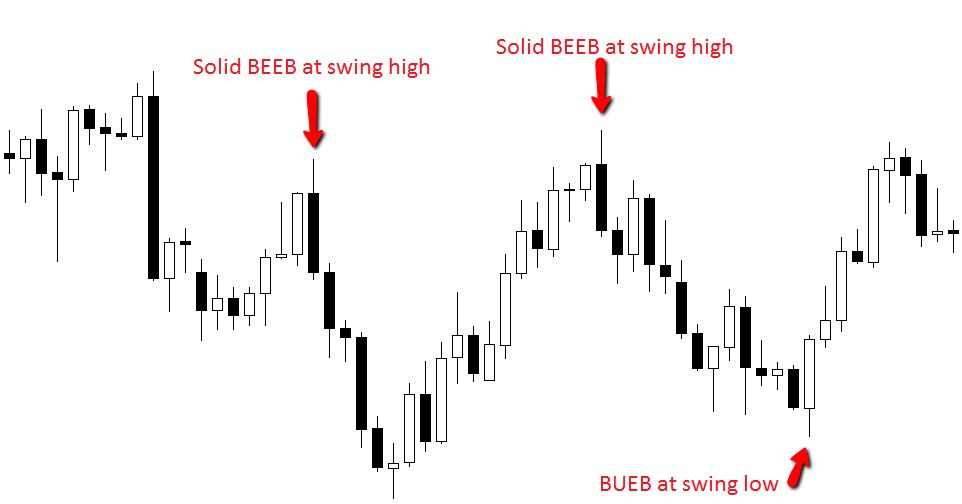
Chart Example #3:
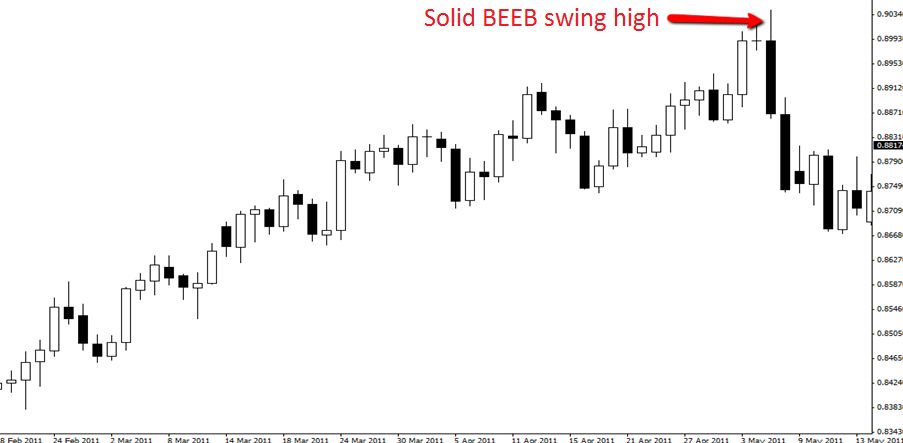
Chart Example #4:
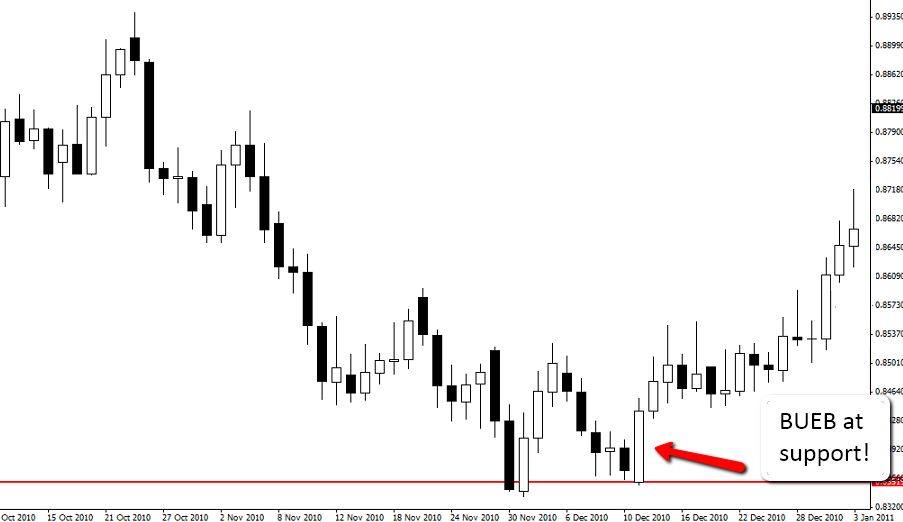
Chart Example #5:
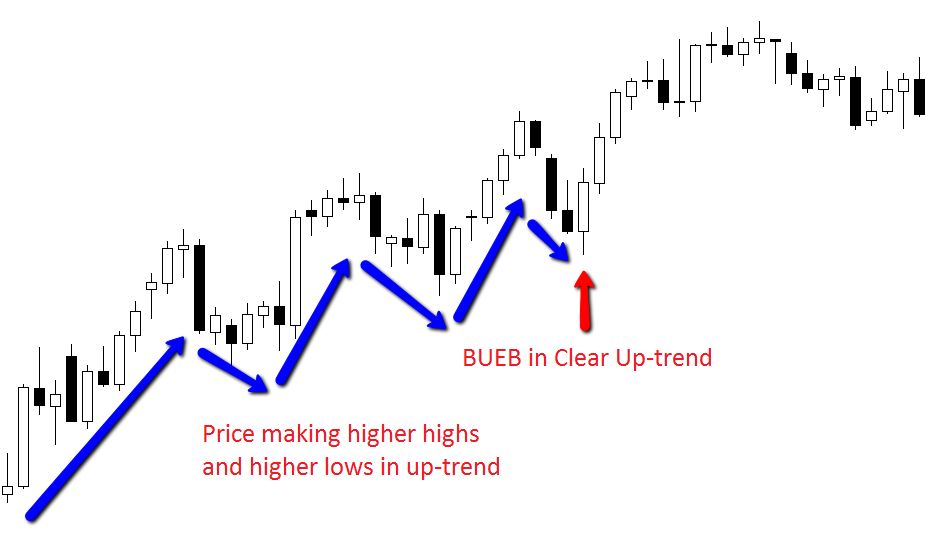
Something some traders can often get confused about with the engulfing bar is the formation and how it has to look.
Please keep the following two points in mind going forward:
- To be a valid engulfing bar it must have a high that is higher than the previous candles high and a low that is lower than the previous candles low.
- The best engulfing bars close in the last 1/3 in the desired direction of the trade. If you keep these two points in mind when looking at all sorts of different engulfing bar formations it will help.
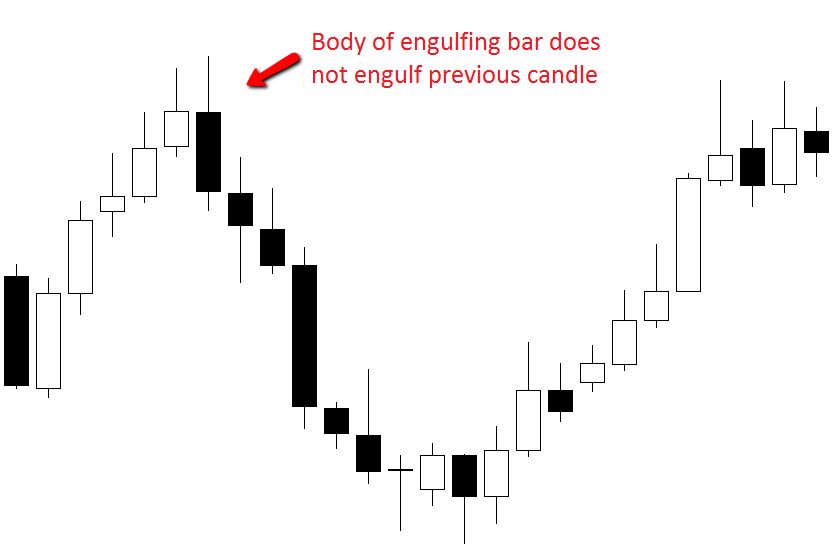
An example below is where traders will often get stumped. The body of the engulfing bar is not fully engulfing the previous candle and this can throw traders, but just remember both the above points and they will hold you in good stead. This is an A+ BEEB and as long as it meets the above two points it does not need to have anything else.
The body of the candle does not need to be engulfing anything etc. The below candle is a valid BEEB – higher highs and lower lower and closes in last 1/3.
Chart Example #6:
 [/text_block][/op_liveeditor_element]
[op_liveeditor_element data-style=””][text_block style=”style_1.png” align=”left” font_size=”16″ font_font=”Montserrat” font_color=”%237e7e7e”]
Engulfing Bars Recap
The Bullish or Bearish Engulfing Bar is one of the most reliable and profitable Price Action setups a trader can employ.
It can also be one of the most powerful when traders remember that size does matter and not to get worried by large engulfing bars. Instead of running away from them, do the opposite; hunt for them. Large candles equal large momentum and this is why when you see a huge candle form you will then often see an even bigger candle form in the same direction the very next candle.
The trader must only trade A+ Engulfing Bars. What are A+ Engulfing Bars? The Engulfing Bar must be a large obvious bar, compared to the other bars around it and it must stick out from the crowd and form at swing points.
As you go through the rest of the course and it starts to come together, it will all start to make sense and all begin to fall into place. It is not about simply finding a level and sticking a price action signal on it. It is about learning to read the price action story and this is what you are now starting to do!
All traders new to the Engulfing Bar must Demo, Demo, Demo until they are comfortable with the setup.[/text_block][/op_liveeditor_element]
[op_liveeditor_elements][/op_liveeditor_elements]
[op_liveeditor_element data-style=””]

[/op_liveeditor_element]
[op_liveeditor_element data-style=””][text_block style=”style_1.png” align=”center” font_size=”25″ font_font=”Source%20Sans%20Pro” font_style=”bold”]
Module Seven
[/text_block][/op_liveeditor_element]
[op_liveeditor_elements][/op_liveeditor_elements]
[op_liveeditor_element data-style=””][text_block style=”style_1.png” align=”left” bottom_margin=”10″]Duration: 10 mins[/text_block][/op_liveeditor_element]
[op_liveeditor_element data-style=””][text_block style=”style_1.png” align=”left” bottom_margin=”10″]Module Progress:[/text_block][/op_liveeditor_element]
[op_liveeditor_element data-style=””]
[/op_liveeditor_element]
[op_liveeditor_element data-style=””]
[/op_liveeditor_element]
[op_liveeditor_element data-style=””][text_block style=”style_1.png” align=”center” top_padding=”6″]« Previous Lesson[/text_block][/op_liveeditor_element]
[op_liveeditor_elements][/op_liveeditor_elements]