
[op_liveeditor_element data-style=””]
LESSON: Entering the Pin Bar
[/op_liveeditor_element]
[op_liveeditor_element data-style=””][text_block style=”style_1.png” align=”left” font_size=”16″ font_font=”Montserrat” font_color=”%237e7e7e”]The only way to enter the pin bar is to enter when price breaks below or above the low or high of the pin bar. Entry is NEVER taken via retrace or on close.
Why we Don’t Use Retrace?
The entry via the break is needed for confirmation and until the price has broken the high or low the pin bar signal is not complete. The reason we do this is a pin bar is NOT confirmed until price has successfully traded below or above the low/high of the pin bar.
Taking an entry this way saves us from entering many trades that don’t go on to break through and this is where the confirmation for the order flow is set.
You will often notice that when price breaks the high or low of the pin bar price will make a quick move and it is this confirmation that we are looking for.
Using this confirmation and entering at the break we can often make our entry and get into breakeven and protect our capital quite quickly using this method.
To use this entry method all we must simply do is set our orders with our broker to either sell stop or buy stop so when price breaks, whether we are watching or not our trade will be entered.
Chart Examples
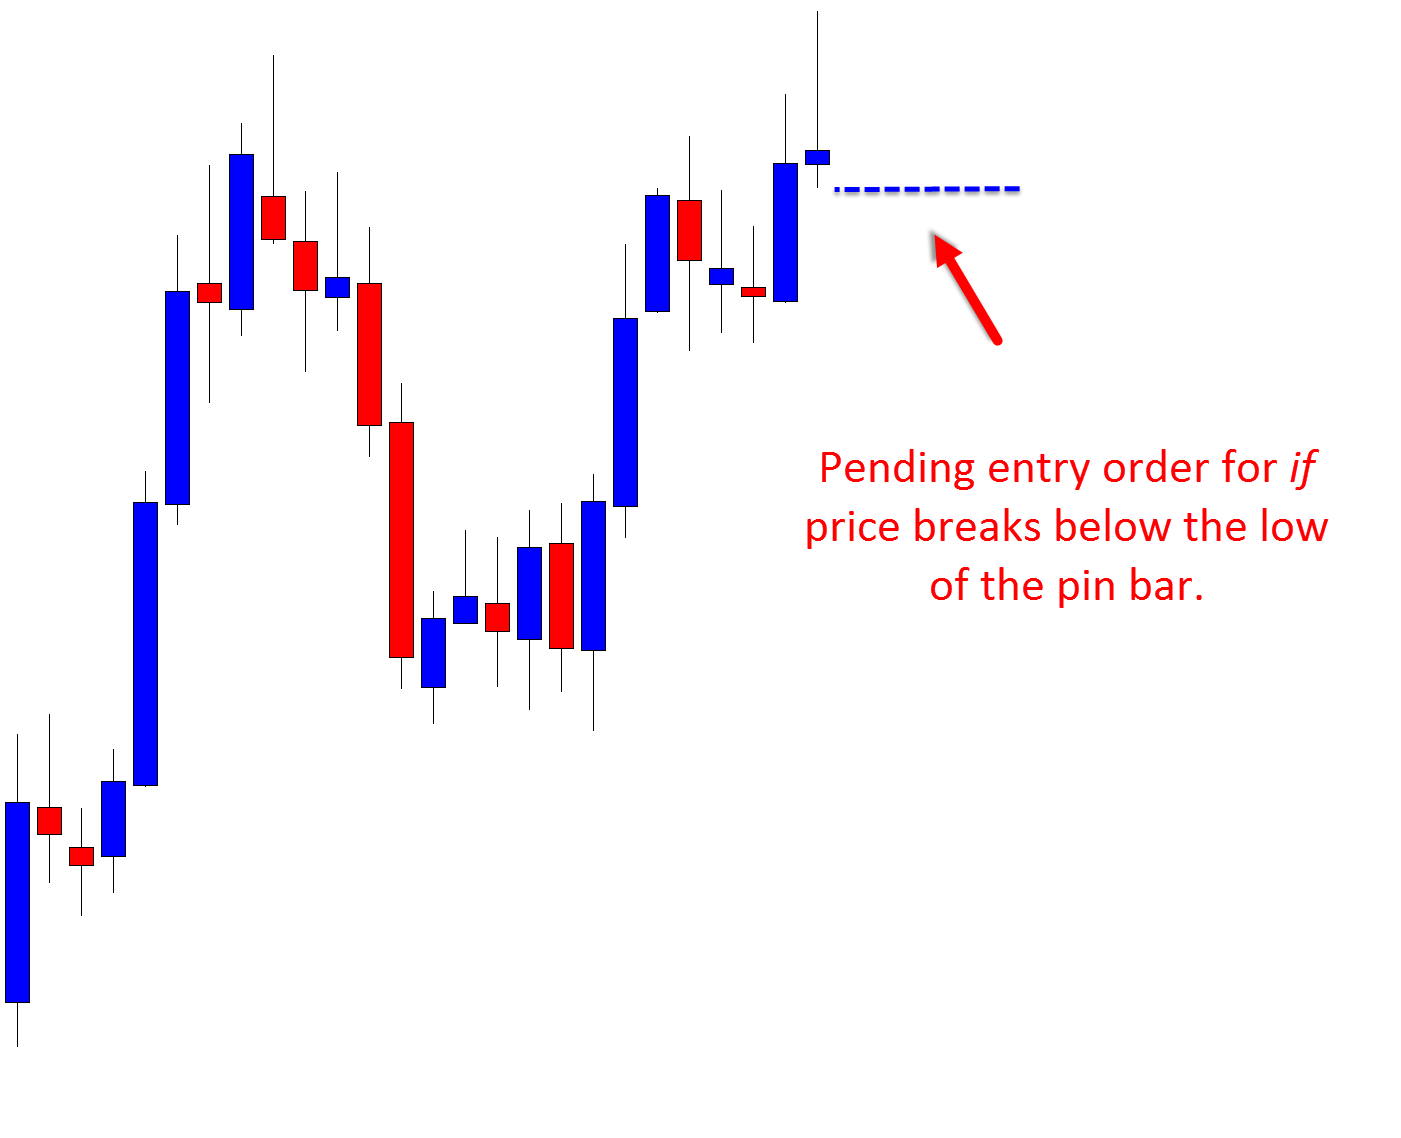
See the chart below for an example picture of where a sell stop order would go for a bearish pin bar.
Chart Example #1:
Example of entering at the break:
When entering at the break the spread needs to be taken into account with all buy trades (going long) so that the trades are not activated before price has actually broken the high of the pin.
If a pair has a spread of 5 pips and the trader does not take this into account with their trade entry calculation buy adding it on to the entry price, then the trader will end up being entered into the trade before price has broken the high of the pin bar by 5 pips.
You need to always think and and factor in the spread otherwise it could cost you your whole trade!
This includes all buy orders including entries, stops and targets.
When you are working out your stops & take profits for your short/sell trades you will be ‘buying’ back to close your trade and this is when you will be paying the spread so this is when you need to add the spread on top so you are not taken out early.
You need to remember: You only pay the spread once ever per trade for a round trade (per open & close). The spread is always paid when you buy. This can be on entry if you buy at entry or on close if you buy back to close a short trade.
Using a Order “Buffer”…
To ensure that price has definitely broken the high or low of the pin bar and not just made a small false break we use what are called buffers.
Buffers are used just to ensure the high or low has definitely breached and our trade has validated.
The amount of pips we should use as our buffer is different for each time frame because the bigger the time frame the more pips we need to see price break the high or the low of the price action signal.
Examples of possible buffers are:
- Weekly Chart: 10-20 pips
- Daily Chart: 5-10 pips
- 4hr Chart: 4-8 pips
- 1hr Chart: 2-4 pips
The above rules for taking the break including, adding the pips spread and using a buffer, apply to all price action signals where taking entry at the break applies.
Chart Example #2:
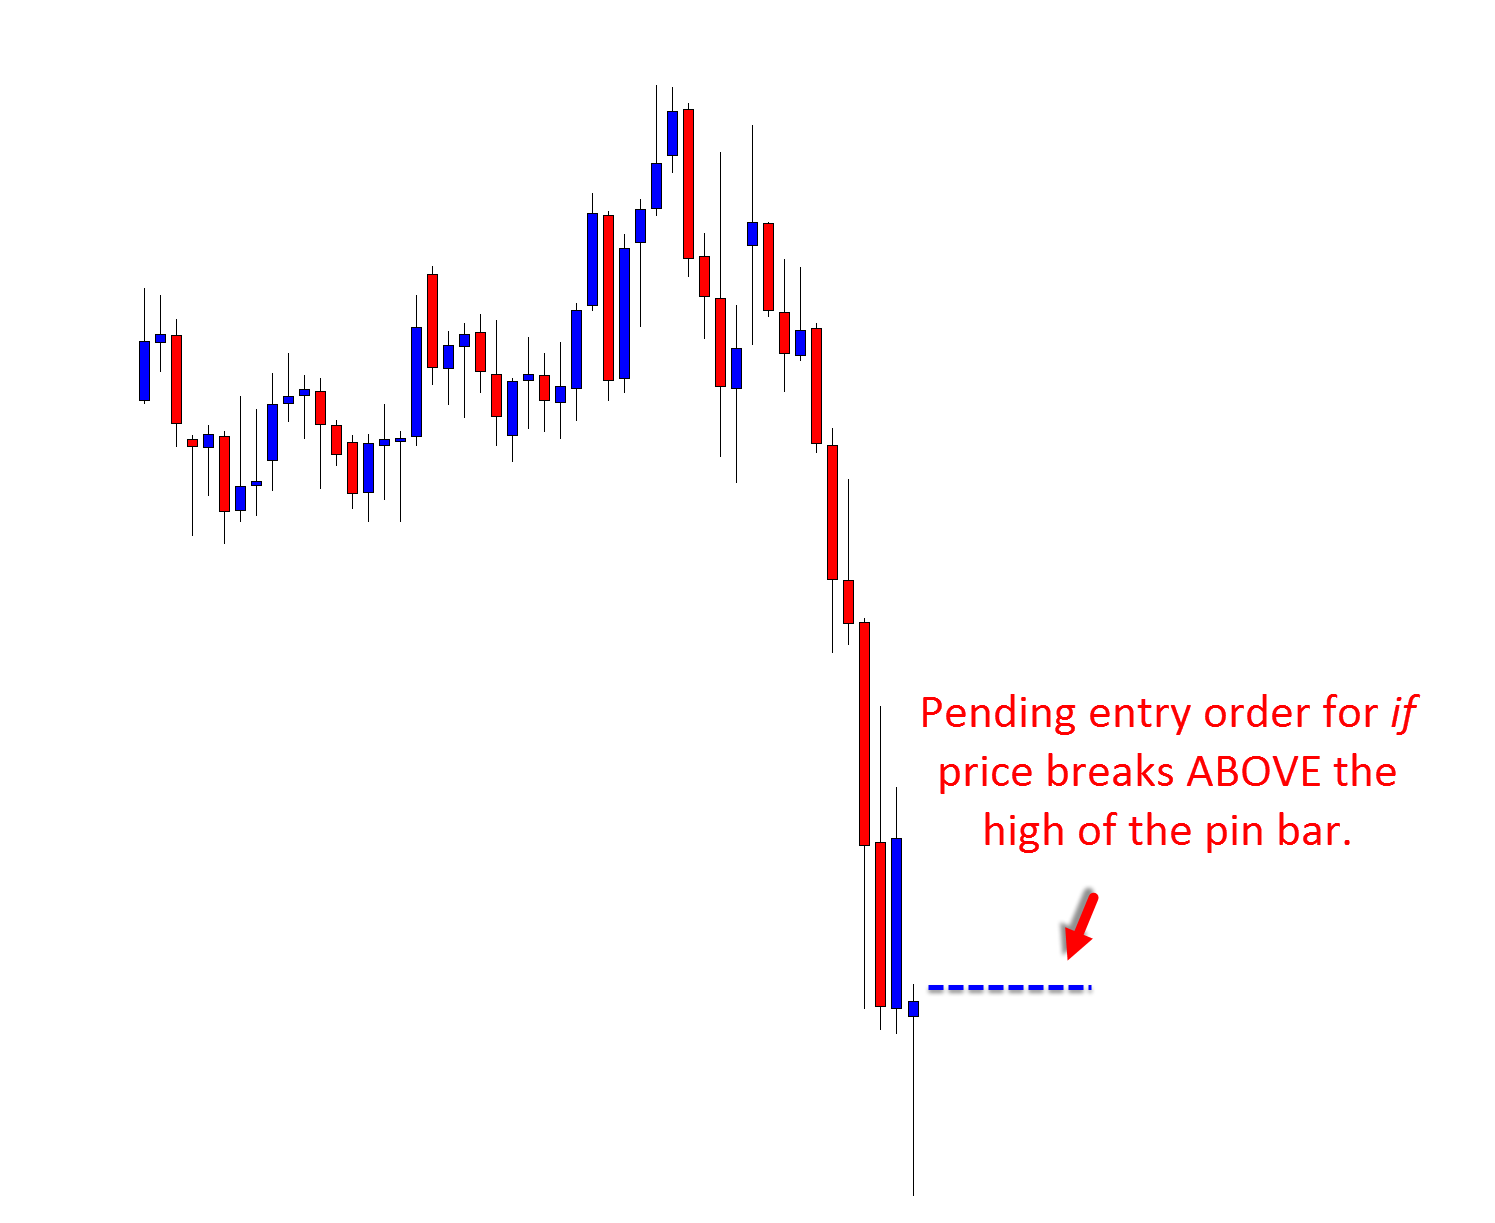
The next chart shows exactly what can happen if we don’t take an entry at the break of the high or low the Pin Bar and enter with momentum.
Chart Example #3:
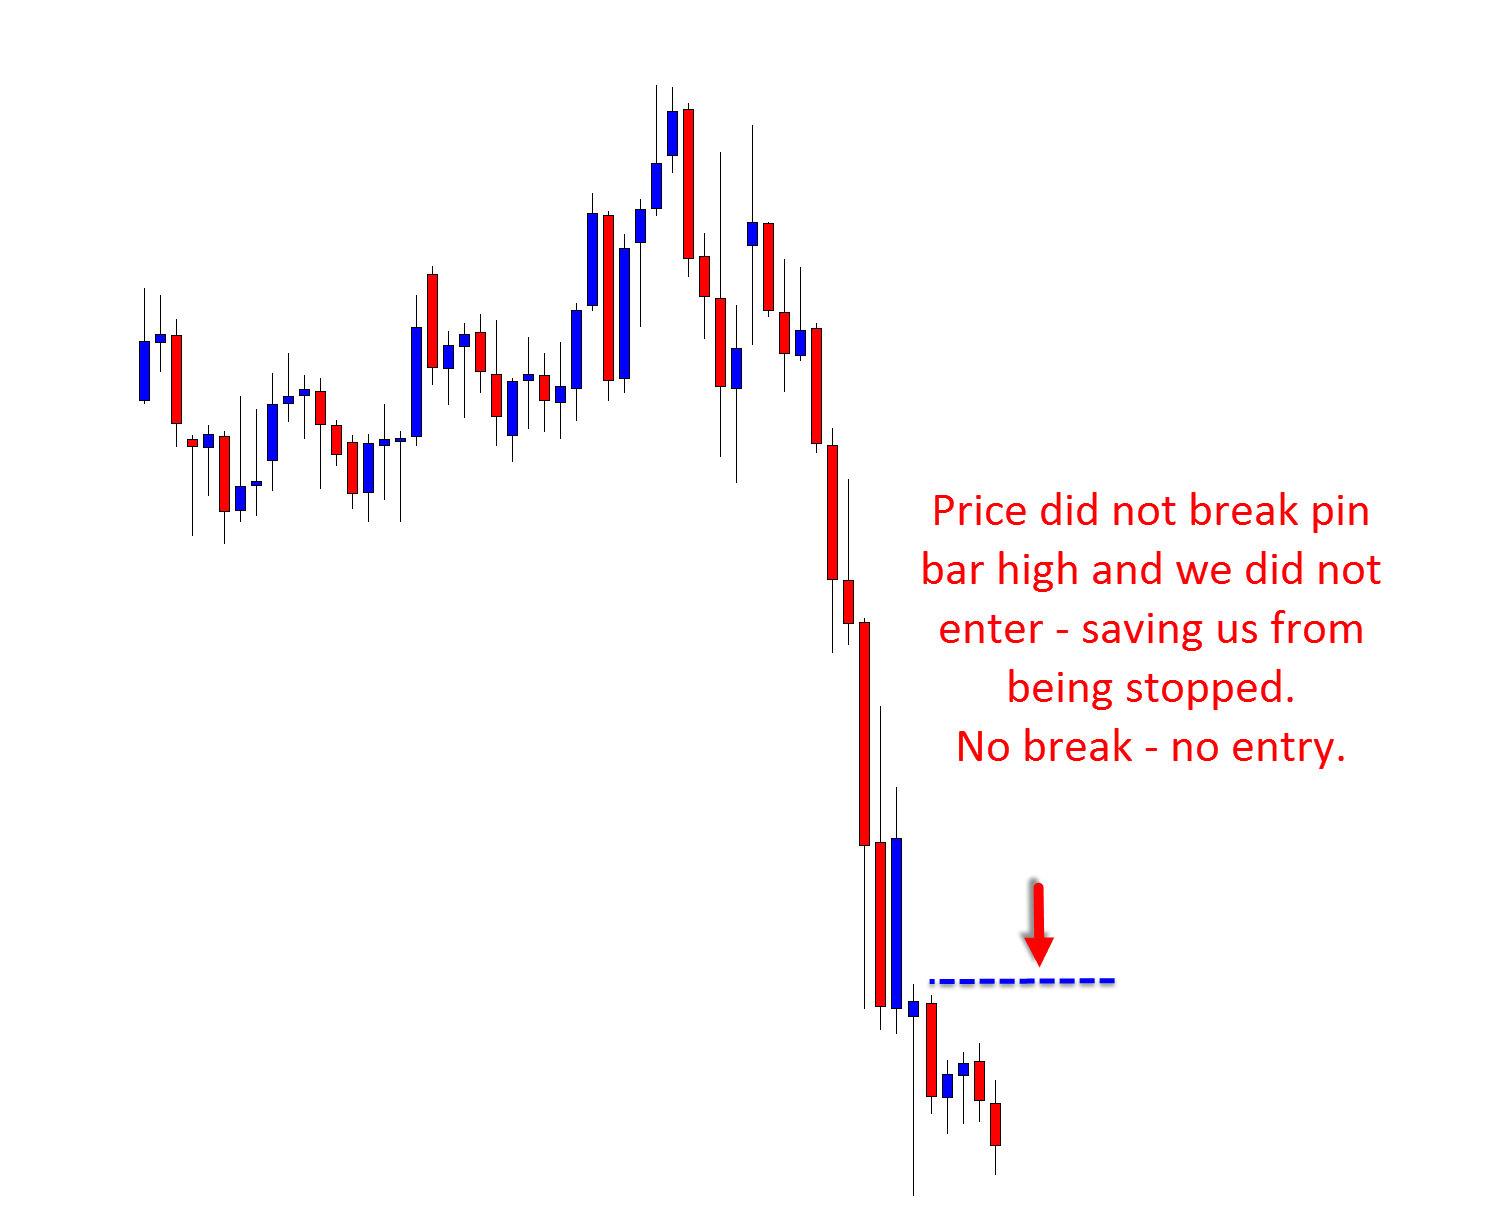
Note:
When you have finished the course there is a lesson for students in the resources called “Tips and Tricks” I highly recommend you read when you have finished the course and bookmark as a lesson to come back to because it has a ton of helpful tips like how to use buffers, spreads, markets to avoid, best charts to include etc,.[/text_block][/op_liveeditor_element]
[op_liveeditor_elements][/op_liveeditor_elements]
[op_liveeditor_element data-style=””]

[/op_liveeditor_element]
[op_liveeditor_element data-style=””][text_block style=”style_1.png” align=”center” font_size=”25″ font_font=”Source%20Sans%20Pro” font_style=”bold”]
Module Six
[/text_block][/op_liveeditor_element]
[op_liveeditor_elements][/op_liveeditor_elements]
[op_liveeditor_element data-style=””][text_block style=”style_1.png” align=”left” bottom_margin=”10″]Duration: 12 mins[/text_block][/op_liveeditor_element]
[op_liveeditor_element data-style=””][text_block style=”style_1.png” align=”left” bottom_margin=”10″]Module Progress:[/text_block][/op_liveeditor_element]
[op_liveeditor_element data-style=””]
[/op_liveeditor_element]
[op_liveeditor_element data-style=””]
[/op_liveeditor_element]
[op_liveeditor_element data-style=””][text_block style=”style_1.png” align=”center” top_padding=”6″]« Previous Lesson[/text_block][/op_liveeditor_element]
[op_liveeditor_elements][/op_liveeditor_elements]