
[op_liveeditor_element data-style=””]
LESSON: Big Round Numbers
[/op_liveeditor_element]
[op_liveeditor_element data-style=””][text_block style=”style_1.png” align=”left” font_size=”16″ font_font=”Montserrat” font_color=”%237e7e7e”]Round numbers = RN’s and especially Very Big Round Numbers = VBRN’s work very similar to support and resistance.
Support and resistance works as we have just discussed because if I am watching a level that I think is key I will put my entry there.
If a lot of other traders are watching the same level and agree they will do the same thing. When price gets to this level all these entry’s/orders will start being hit like fireworks and price will move away from that level.
Very Big Round Numbers
These major numbers work the same way, only traders become fixated on the number the closer they become. They factor them into their trades, their entries, their exits, management etc.
For example; when a trader is looking to exit, without even realising it they will look to round their profit order up or down to the closest round number to simplify things.
Now if enough traders do this all of a sudden you have a major Support or Resistance area.
You can then add to that if a huge trading organisation or bank is placing large orders and if they work their orders around a round number it can create huge ripple effect in the markets and this is why you will often see sharp quick movements at these very big round numbers or Very Big Round Number = VBRN.
The best way to use these big round numbers for the benefit of your trading is to factor them in when placing your Support and Resistance zones on your chart and also when looking at managing your trades.
Not all round numbers are worth bothering about. Only the big and important numbers such as:
- AUDUSD- 1.00, 1.100, 1.200
- EURUSD- 1.3500, 1.400, 1.4500
- GBPUSD- 1.5000, 15500, 1.6000
We always want to be trading away from these levels and not into them.
ALSO – don’t get carried away. Don’t start using every tiny round number and worrying about every silly number. 2 things to note about this;
1: You want to use them WITH your other levels and not by themselves.
2: You want to use the very big round numbers and just take not of the other Big Round Numbers for trade management, targets, stops etc, but do not let you get in the way of taking trades etc.
Chart Examples
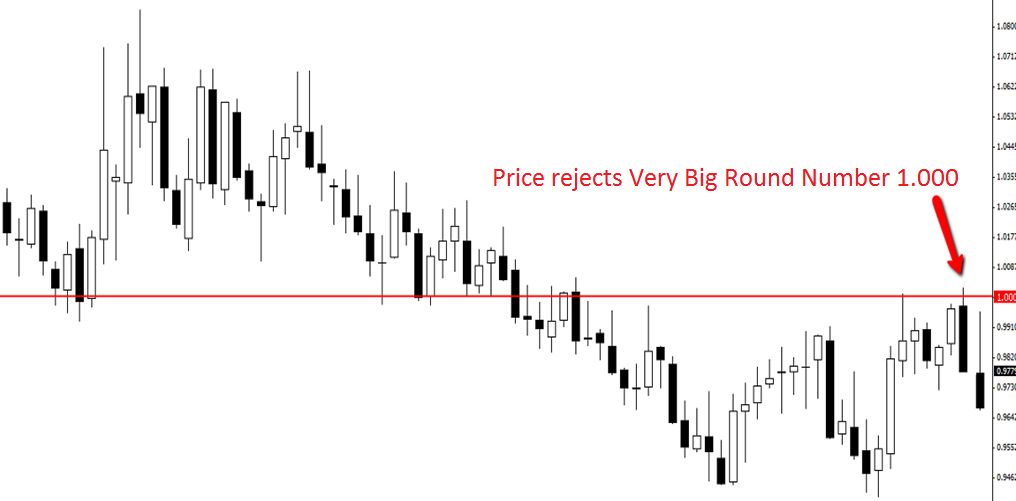
Example #1:
Chart examples of price behaving at Very Big Round Numbers
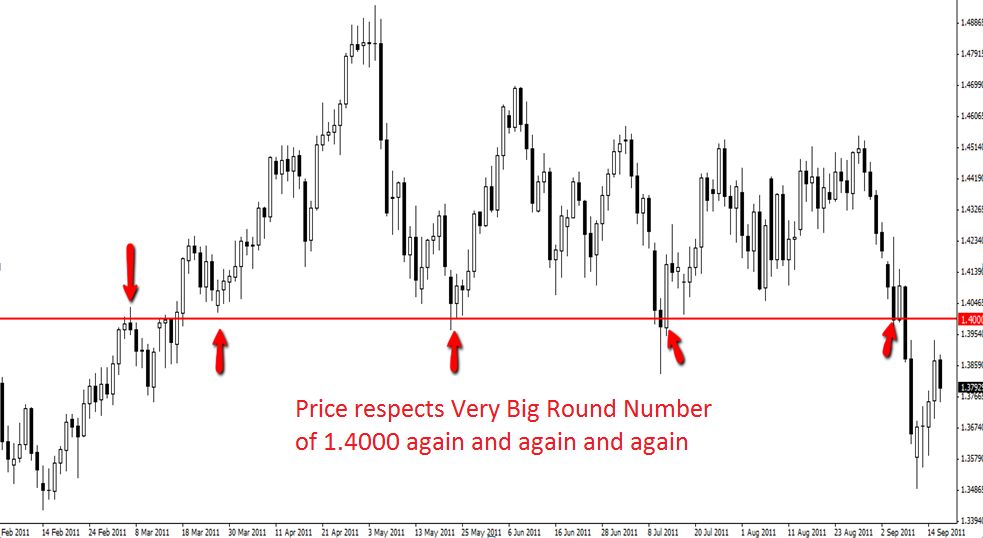
Example #2:
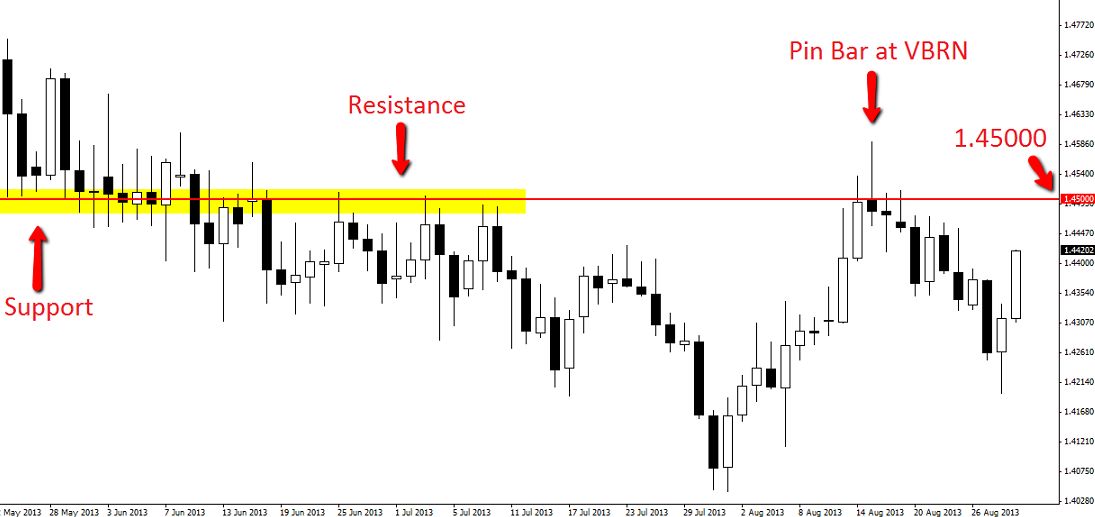
Example #3:
Below is another example of price rejecting a VBRN.
In this example; price has moved up to resistance and VBRN of 1.4500 and produced a Pin Bar on the daily chart of GBPCHF before selling off and moving lower.
[/text_block][/op_liveeditor_element]
[op_liveeditor_element data-style=””][text_block style=”style_1.png” align=”left” font_size=”16″ font_font=”Montserrat” font_color=”%237e7e7e”]
Recap… so far
So far you have learned where to look for your trades, the different market types, how to get into trends and the key rules about how price moves.
In the next part of the course you will be taught the Price Action setups that will over time become your ‘bread & butter’ setups. Without the crucial information of where on the chart to play the Price Action setups, the setups on their own are useless.
As you move through the next parts of the course keep in your mind that the reason you learn first about support and resistance and trend identification is because these are the most important parts of any trade high probability price action trade.
The price action signal you use to enter the trade is only what you use as confirmation to get into the trade and is only one candle.
The trend and support and resistance are the whole chart and are made up of many candles. High probability trades have both of these working together. This will become clearer as you move through the course, but keep it in mind as you now move on.[/text_block][/op_liveeditor_element]
[op_liveeditor_elements][/op_liveeditor_elements]
Trading with BRN’s & VBRN’s (example on live trade):
[op_liveeditor_element data-style=””]

[/op_liveeditor_element]
[op_liveeditor_element data-style=””][text_block style=”style_1.png” align=”center” font_size=”25″ font_font=”Source%20Sans%20Pro” font_style=”bold”]
Module Four
[/text_block][/op_liveeditor_element]
[op_liveeditor_elements][/op_liveeditor_elements]
[op_liveeditor_element data-style=””][text_block style=”style_1.png” align=”left” bottom_margin=”10″]Duration: 15 mins[/text_block][/op_liveeditor_element]
[op_liveeditor_element data-style=””][text_block style=”style_1.png” align=”left” bottom_margin=”10″]Module Progress:[/text_block][/op_liveeditor_element]
[op_liveeditor_element data-style=””]
[/op_liveeditor_element]
[op_liveeditor_element data-style=””]
[/op_liveeditor_element]
[op_liveeditor_element data-style=””][text_block style=”style_1.png” align=”center” top_padding=”6″]« Previous Lesson[/text_block][/op_liveeditor_element]
[op_liveeditor_elements][/op_liveeditor_elements]
[op_liveeditor_element data-style=””]
Action Steps & Downloads / Links
[/op_liveeditor_element]
[op_liveeditor_element data-style=””]

Watch Video
[/op_liveeditor_element]
[op_liveeditor_elements][/op_liveeditor_elements]