
[op_liveeditor_element data-style=””]
LESSON: Stop Placement for the Engulfing Bar
[/op_liveeditor_element]
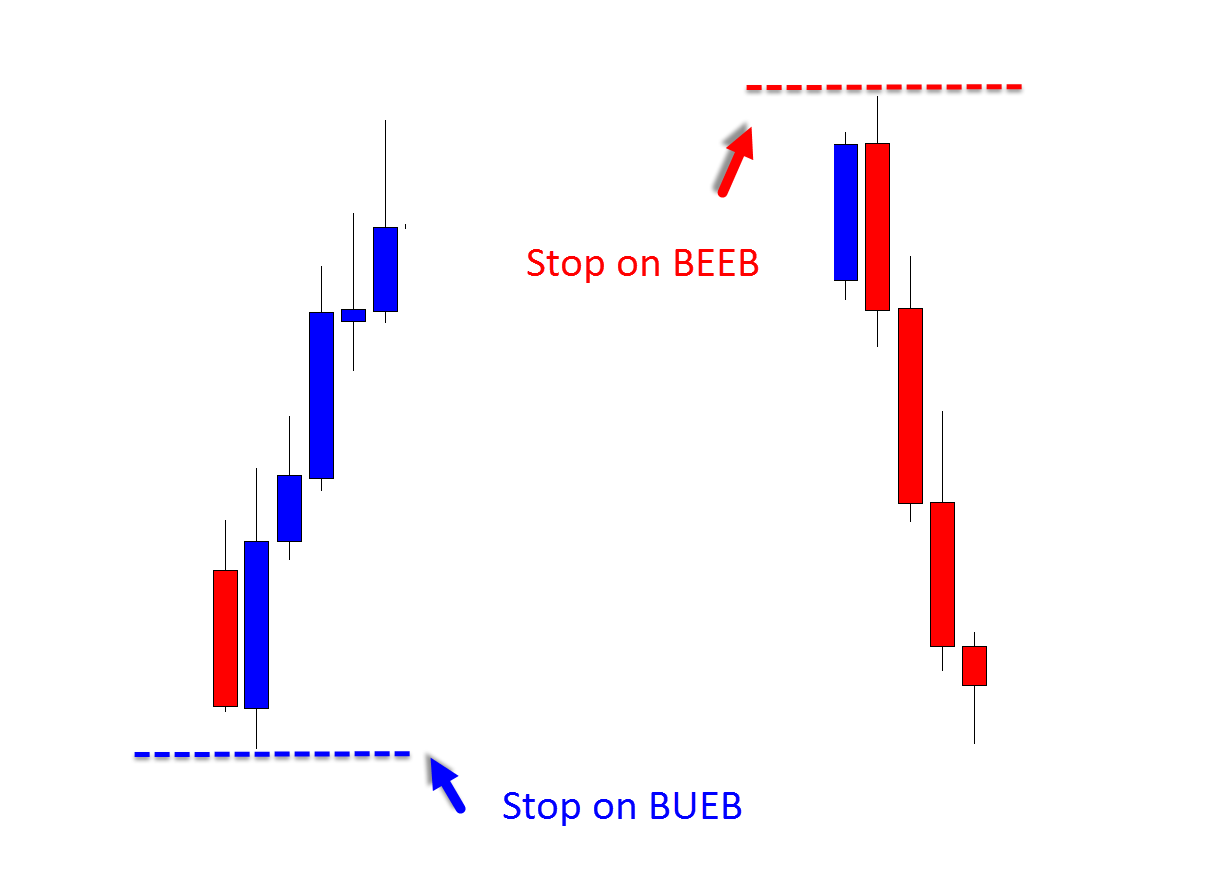
[op_liveeditor_element data-style=””][text_block style=”style_1.png” align=”left” font_size=”16″ font_font=”Montserrat” font_color=”%237e7e7e”]The stock standard stop placement is to place our stop above the high or low of the Engulfing Bar.
Often with the large engulfing bars you will get large retraces that will whipsaw you out if you don’t have the stop placed above or below the bar. The best way to avoid this is with a stop above the high or low of the engulfing bar. See chart below.
Example of stock standard stop placement on Engulfing Bar
Sometimes the stops can be huge on engulfing bars.
When you can’t take a retrace entry to reduce the stop, required you can shorten the stop.
This is a very aggressive trade management tool and only to be used after a lot of practice.
The best way to shorten the stop with the engulfing bar is to use the surrounding price as a buffer between the entry point and the stop.
NOTE: As with everything we do it is based in price action and using the surrounding price action story. Not random, not guesswork and very methodical.
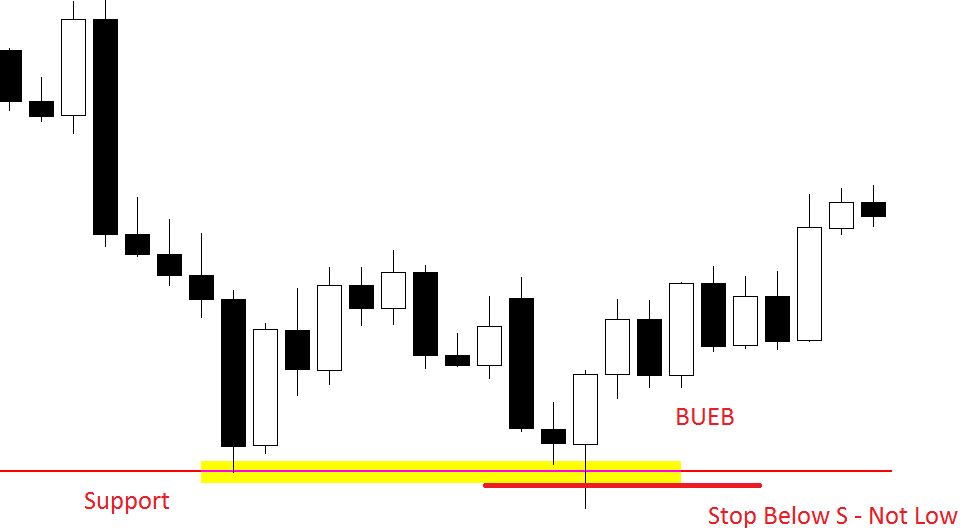
How to Shorten Stop on Engulfing Bar
Oftentimes engulfing bars will form at key support and resistance levels and you can use these same key support and resistance levels to your advantage to shorten your stops.
Depending on how the levels have worked out it is often possible that you can use the level as a barrier between where price currently is and where you want to put your stop. This will often dramatically shorten your stop that would have had to have been placed above the high or low of the engulfing bar.
See the charts below for further explanations.
NOTE OF CAUTION: I highly advise new traders to stick with the basic stops with engulfing bars, just until they are familiar and profitable with the basic stop strategies above the high & low.
The reason for this is it can be a slippery slope and learning when to apply this stop strategy can be tricky. The newer trader can quickly find themselves using this stop more often than they should be and at inappropriate times, which then leads to being stopped out more often than they should and missing out on winners.
This will quickly lead to losing trades that they really should not be losing because of not giving the trade the room it needs. Whilst this stop strategy can be a real tactical advantage for traders to have in their trading tool kit, there needs to be a real level of trading experience so that the trader understands fully in which circumstances it should be deployed.
This can be a super strategy to use and I highly recommend using it when you 100% understand it, but you need to use the story and supporting price action and as already covered in the course; let the market come to you and if the stop is not there to be shortened, either go with the stock standard stop, or pass on the trade.
Chart Example #1:

Chart Example #2:
 [/text_block][/op_liveeditor_element]
[op_liveeditor_elements][/op_liveeditor_elements]
[op_liveeditor_element data-style=””]

[/op_liveeditor_element]
[op_liveeditor_element data-style=””][text_block style=”style_1.png” align=”center” font_size=”25″ font_font=”Source%20Sans%20Pro” font_style=”bold”]
Module Seven
[/text_block][/op_liveeditor_element]
[op_liveeditor_elements][/op_liveeditor_elements]
[op_liveeditor_element data-style=””][text_block style=”style_1.png” align=”left” bottom_margin=”10″]Duration: 10 mins[/text_block][/op_liveeditor_element]
[op_liveeditor_element data-style=””][text_block style=”style_1.png” align=”left” bottom_margin=”10″]Module Progress:[/text_block][/op_liveeditor_element]
[op_liveeditor_element data-style=””]
[/op_liveeditor_element]
[op_liveeditor_element data-style=””]
[/op_liveeditor_element]
[op_liveeditor_element data-style=””][text_block style=”style_1.png” align=”center” top_padding=”6″]« Previous Lesson[/text_block][/op_liveeditor_element]
[op_liveeditor_elements][/op_liveeditor_elements]